On-Site Computer Services, Knowledge Base
iPad E-mail Setup Procedure
OS: Likely iOS 6 (based on photo dates and iOS version history iOS version history - Wikipedia). Given that, these instructions may vary from what the reader may encounter.
Created 2013-03-25 trs
Revised 2025-12-23 0518 trs
Return to:
Links and Tools page;
OCS KB & SOP page.
Acknowledgment(s):
Solution/procedure found/created by On-Site Computer Services, Bellingham, WA, USA (www.On-SiteComputer.com).
Notes & Comments:
This KB or SOP was originated as noted above. The iOS OS has should have been updated several times since. Hence, images and instructions may be dated and incorrect.
Procedure:
- In iPad Settings, select "Mail, Contacts, Calendars".
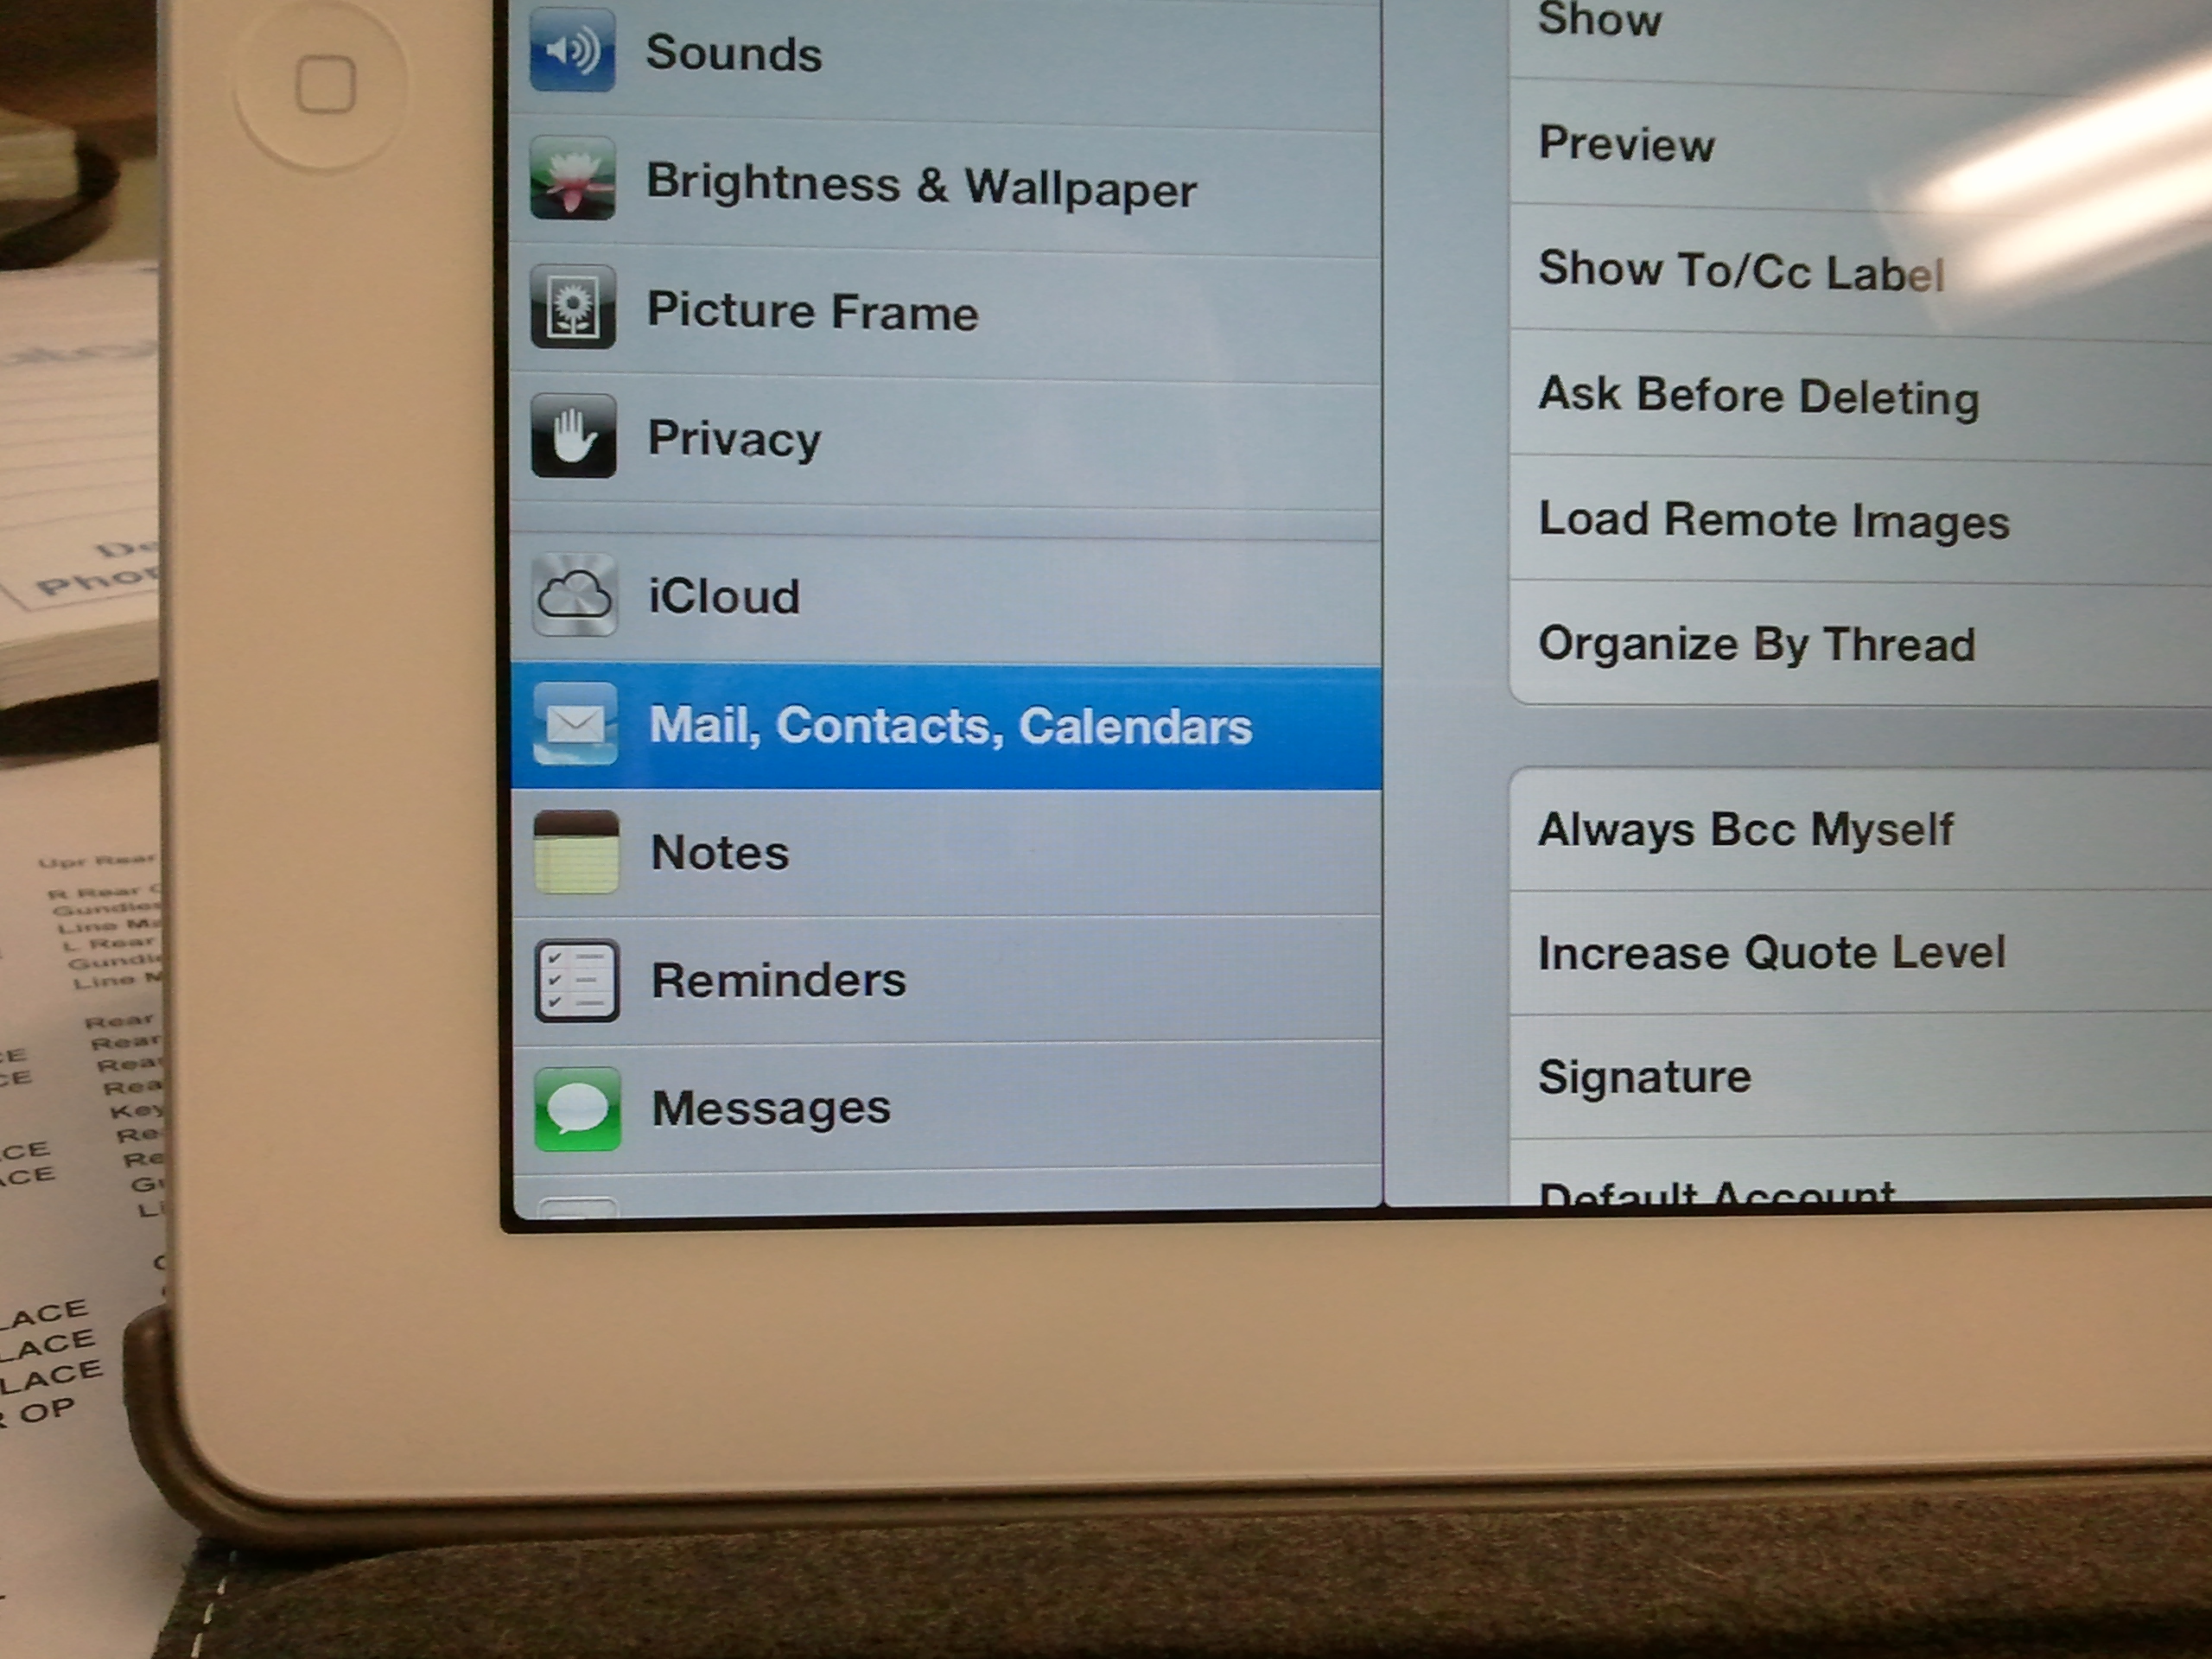
- Select "Add Account...".

- For mail provider Select "Other".
 2560x1920.jpg)
- For "Mail" select "Add Mail Account".

- Select "POP".
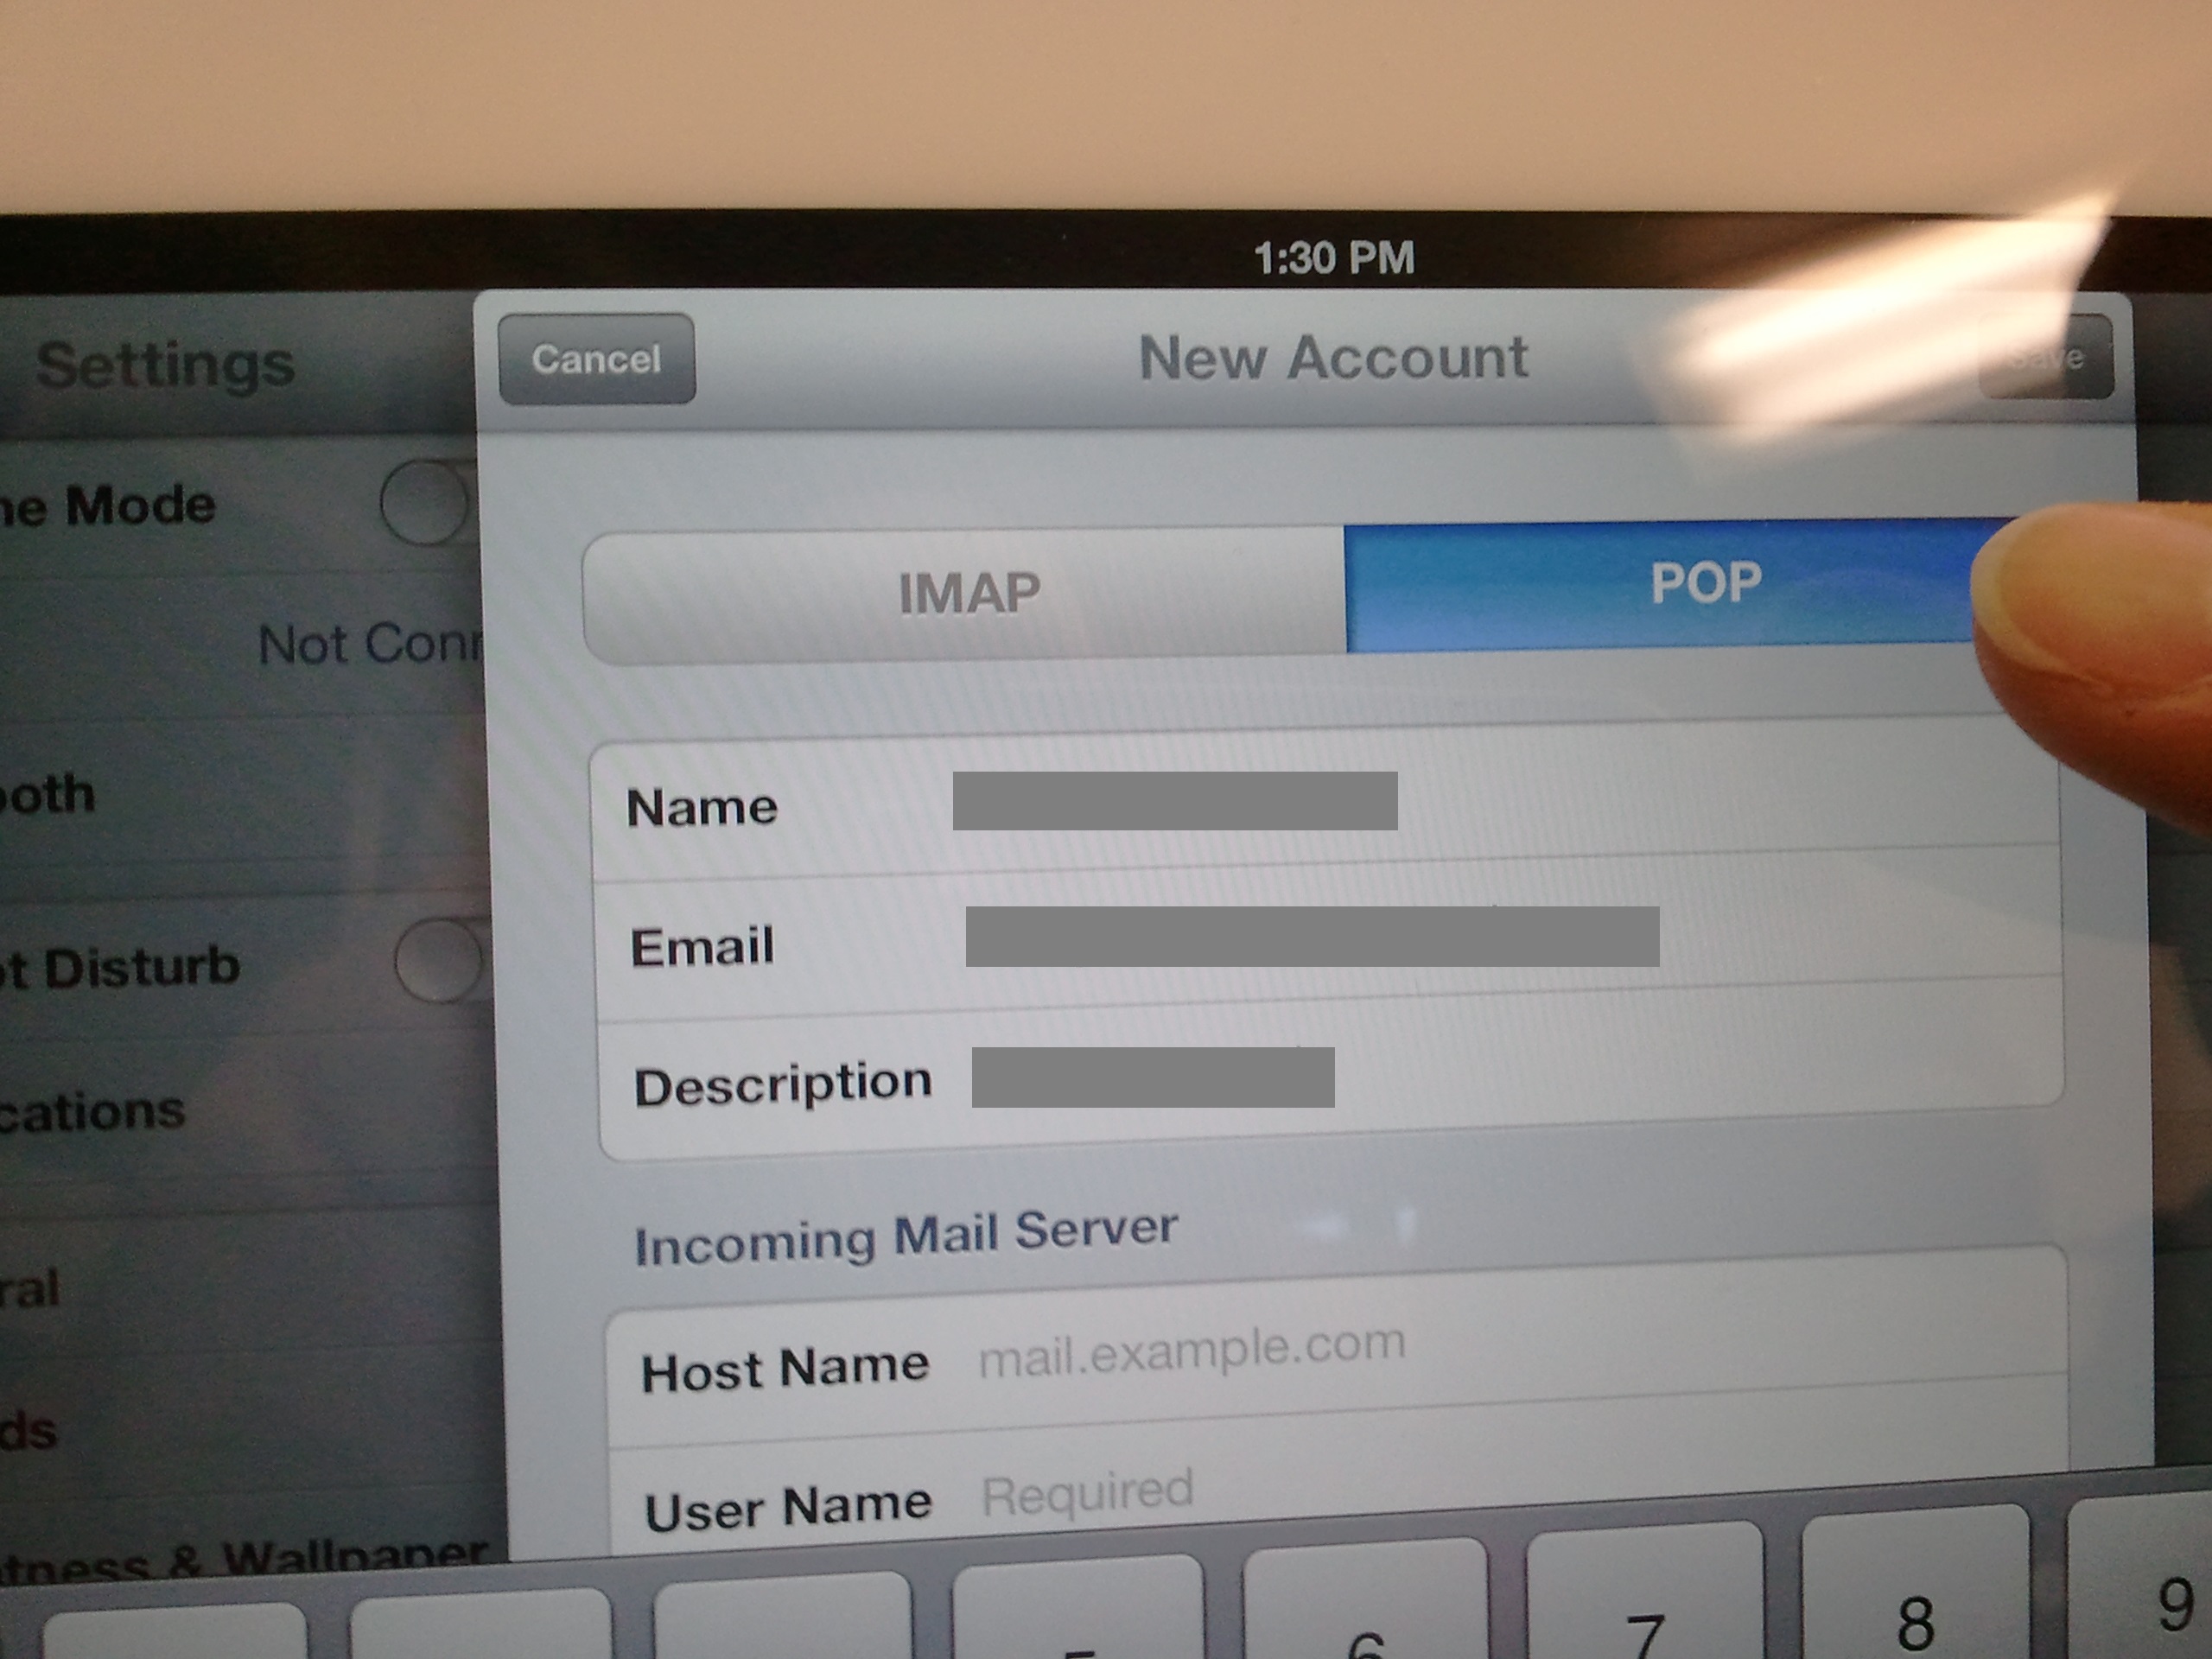
- Fill out the fields as seen following except use the appropriate mailbox and password.
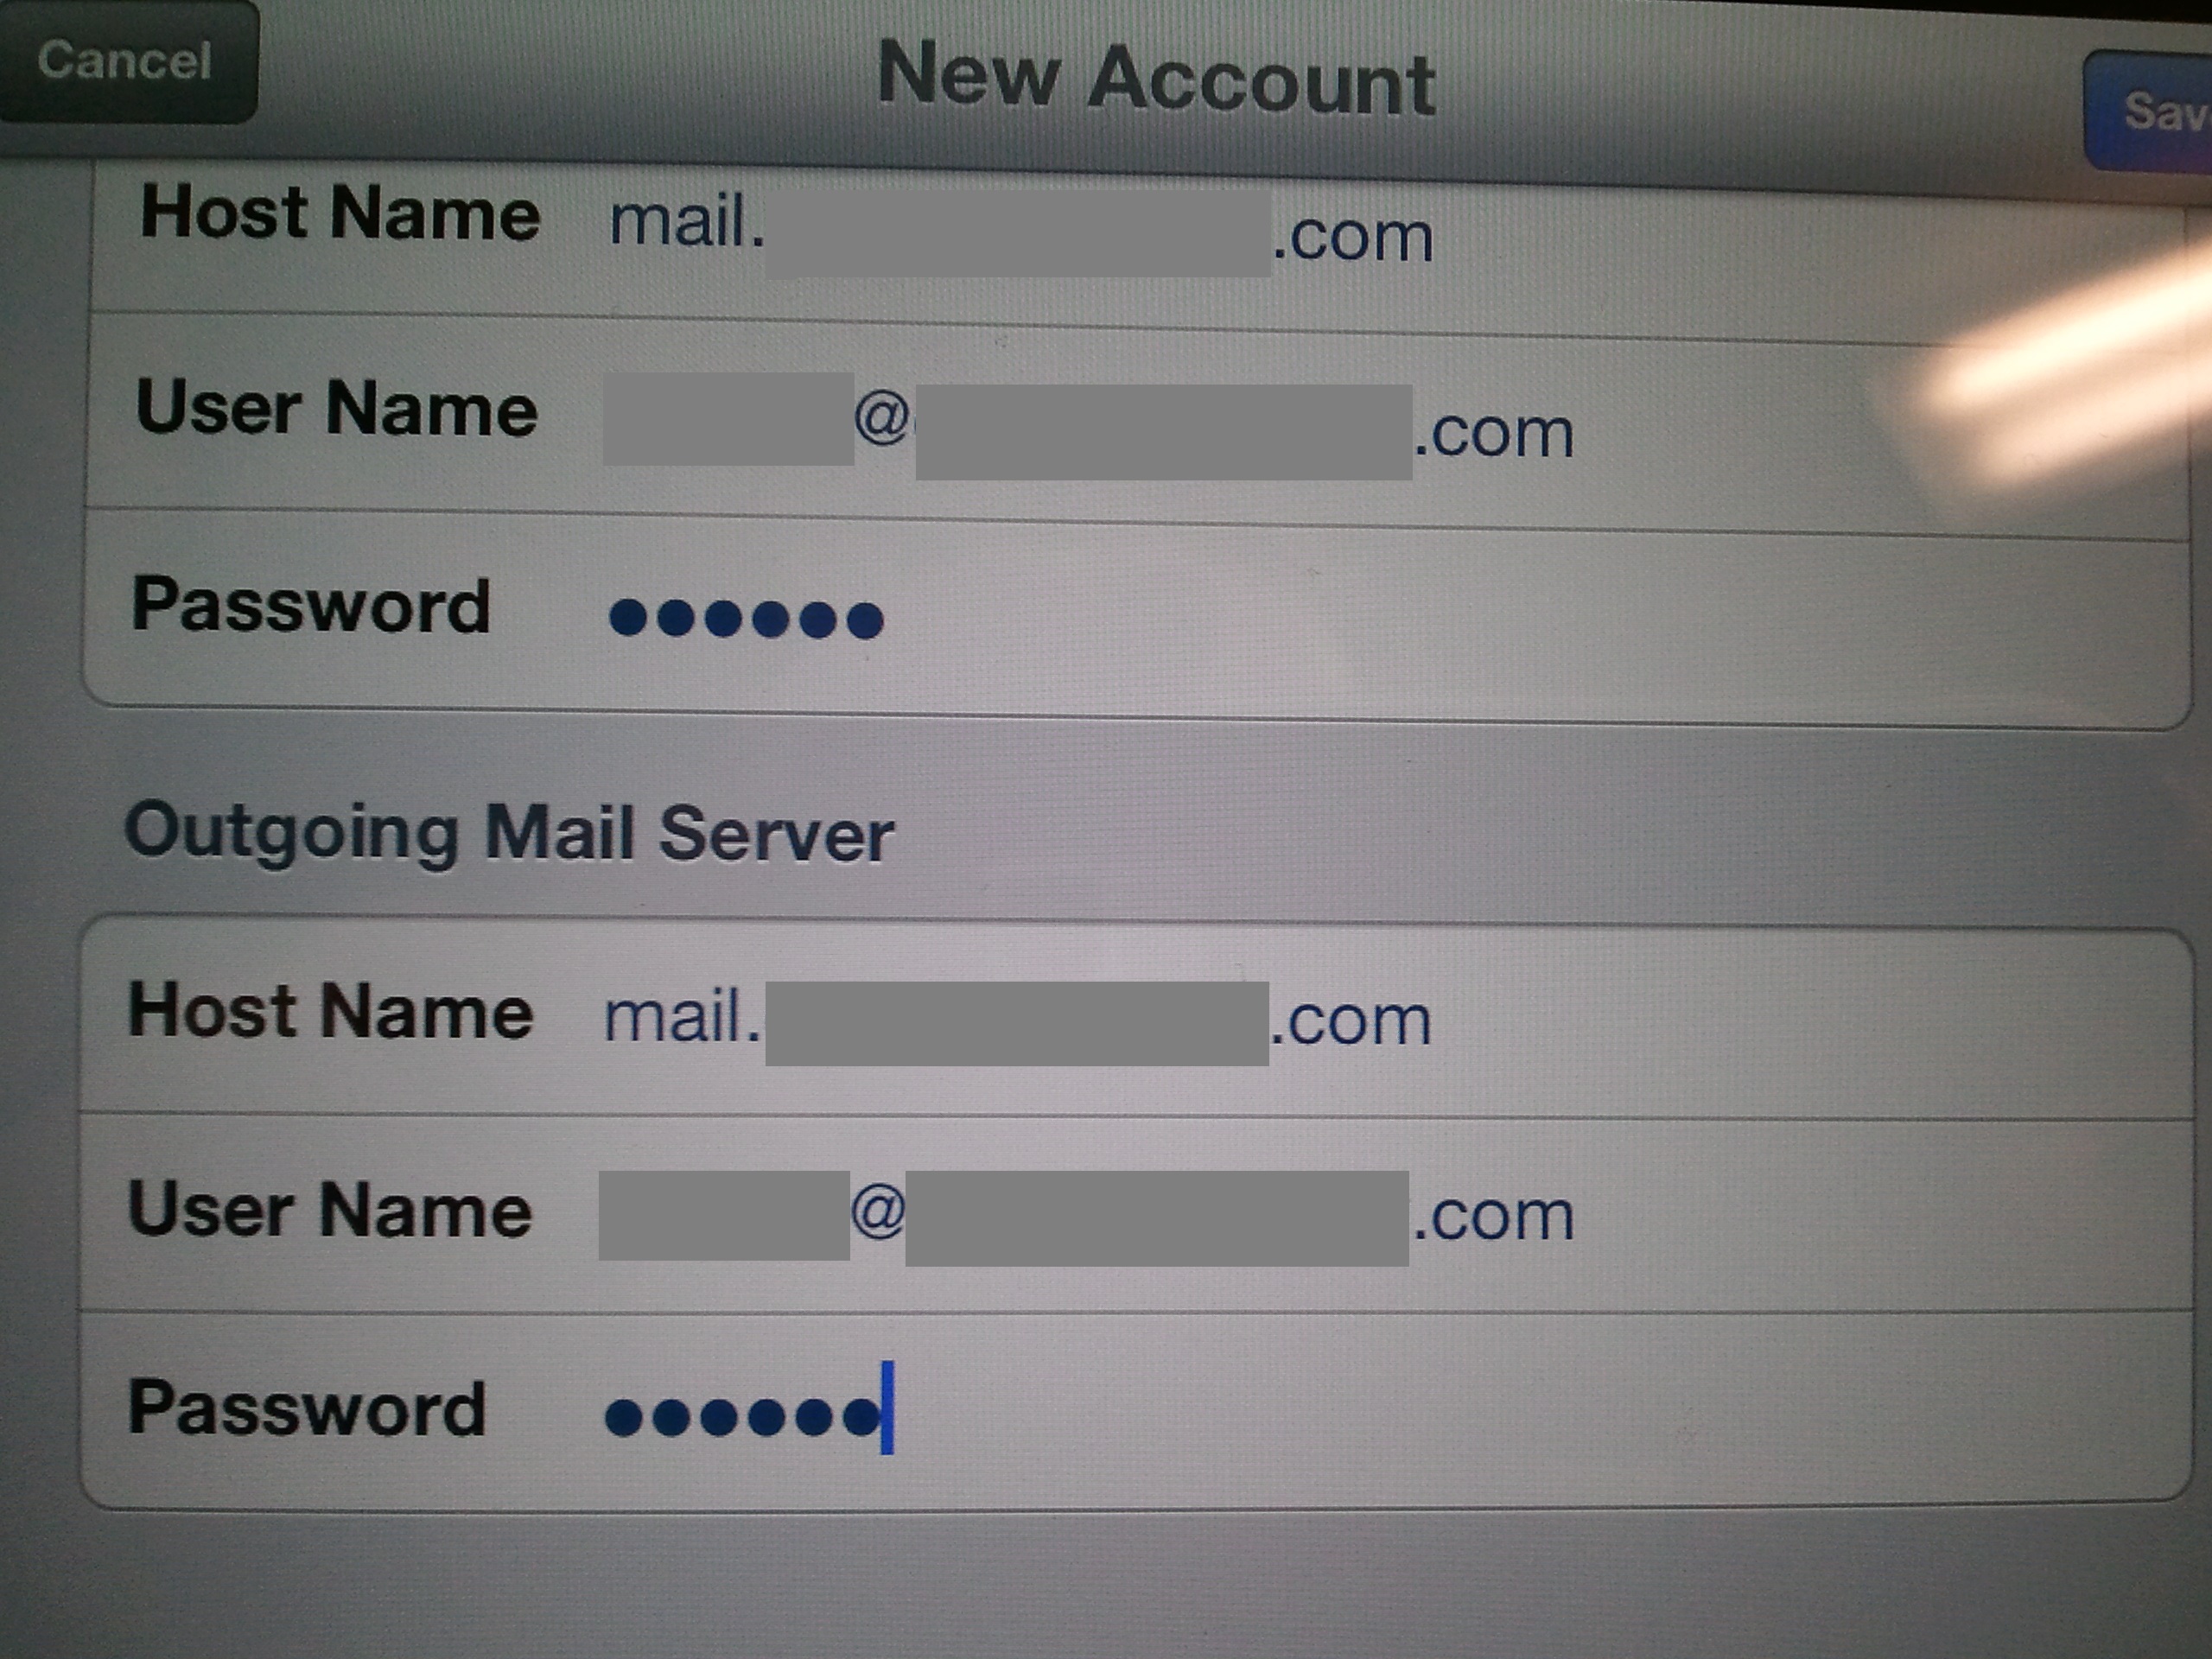
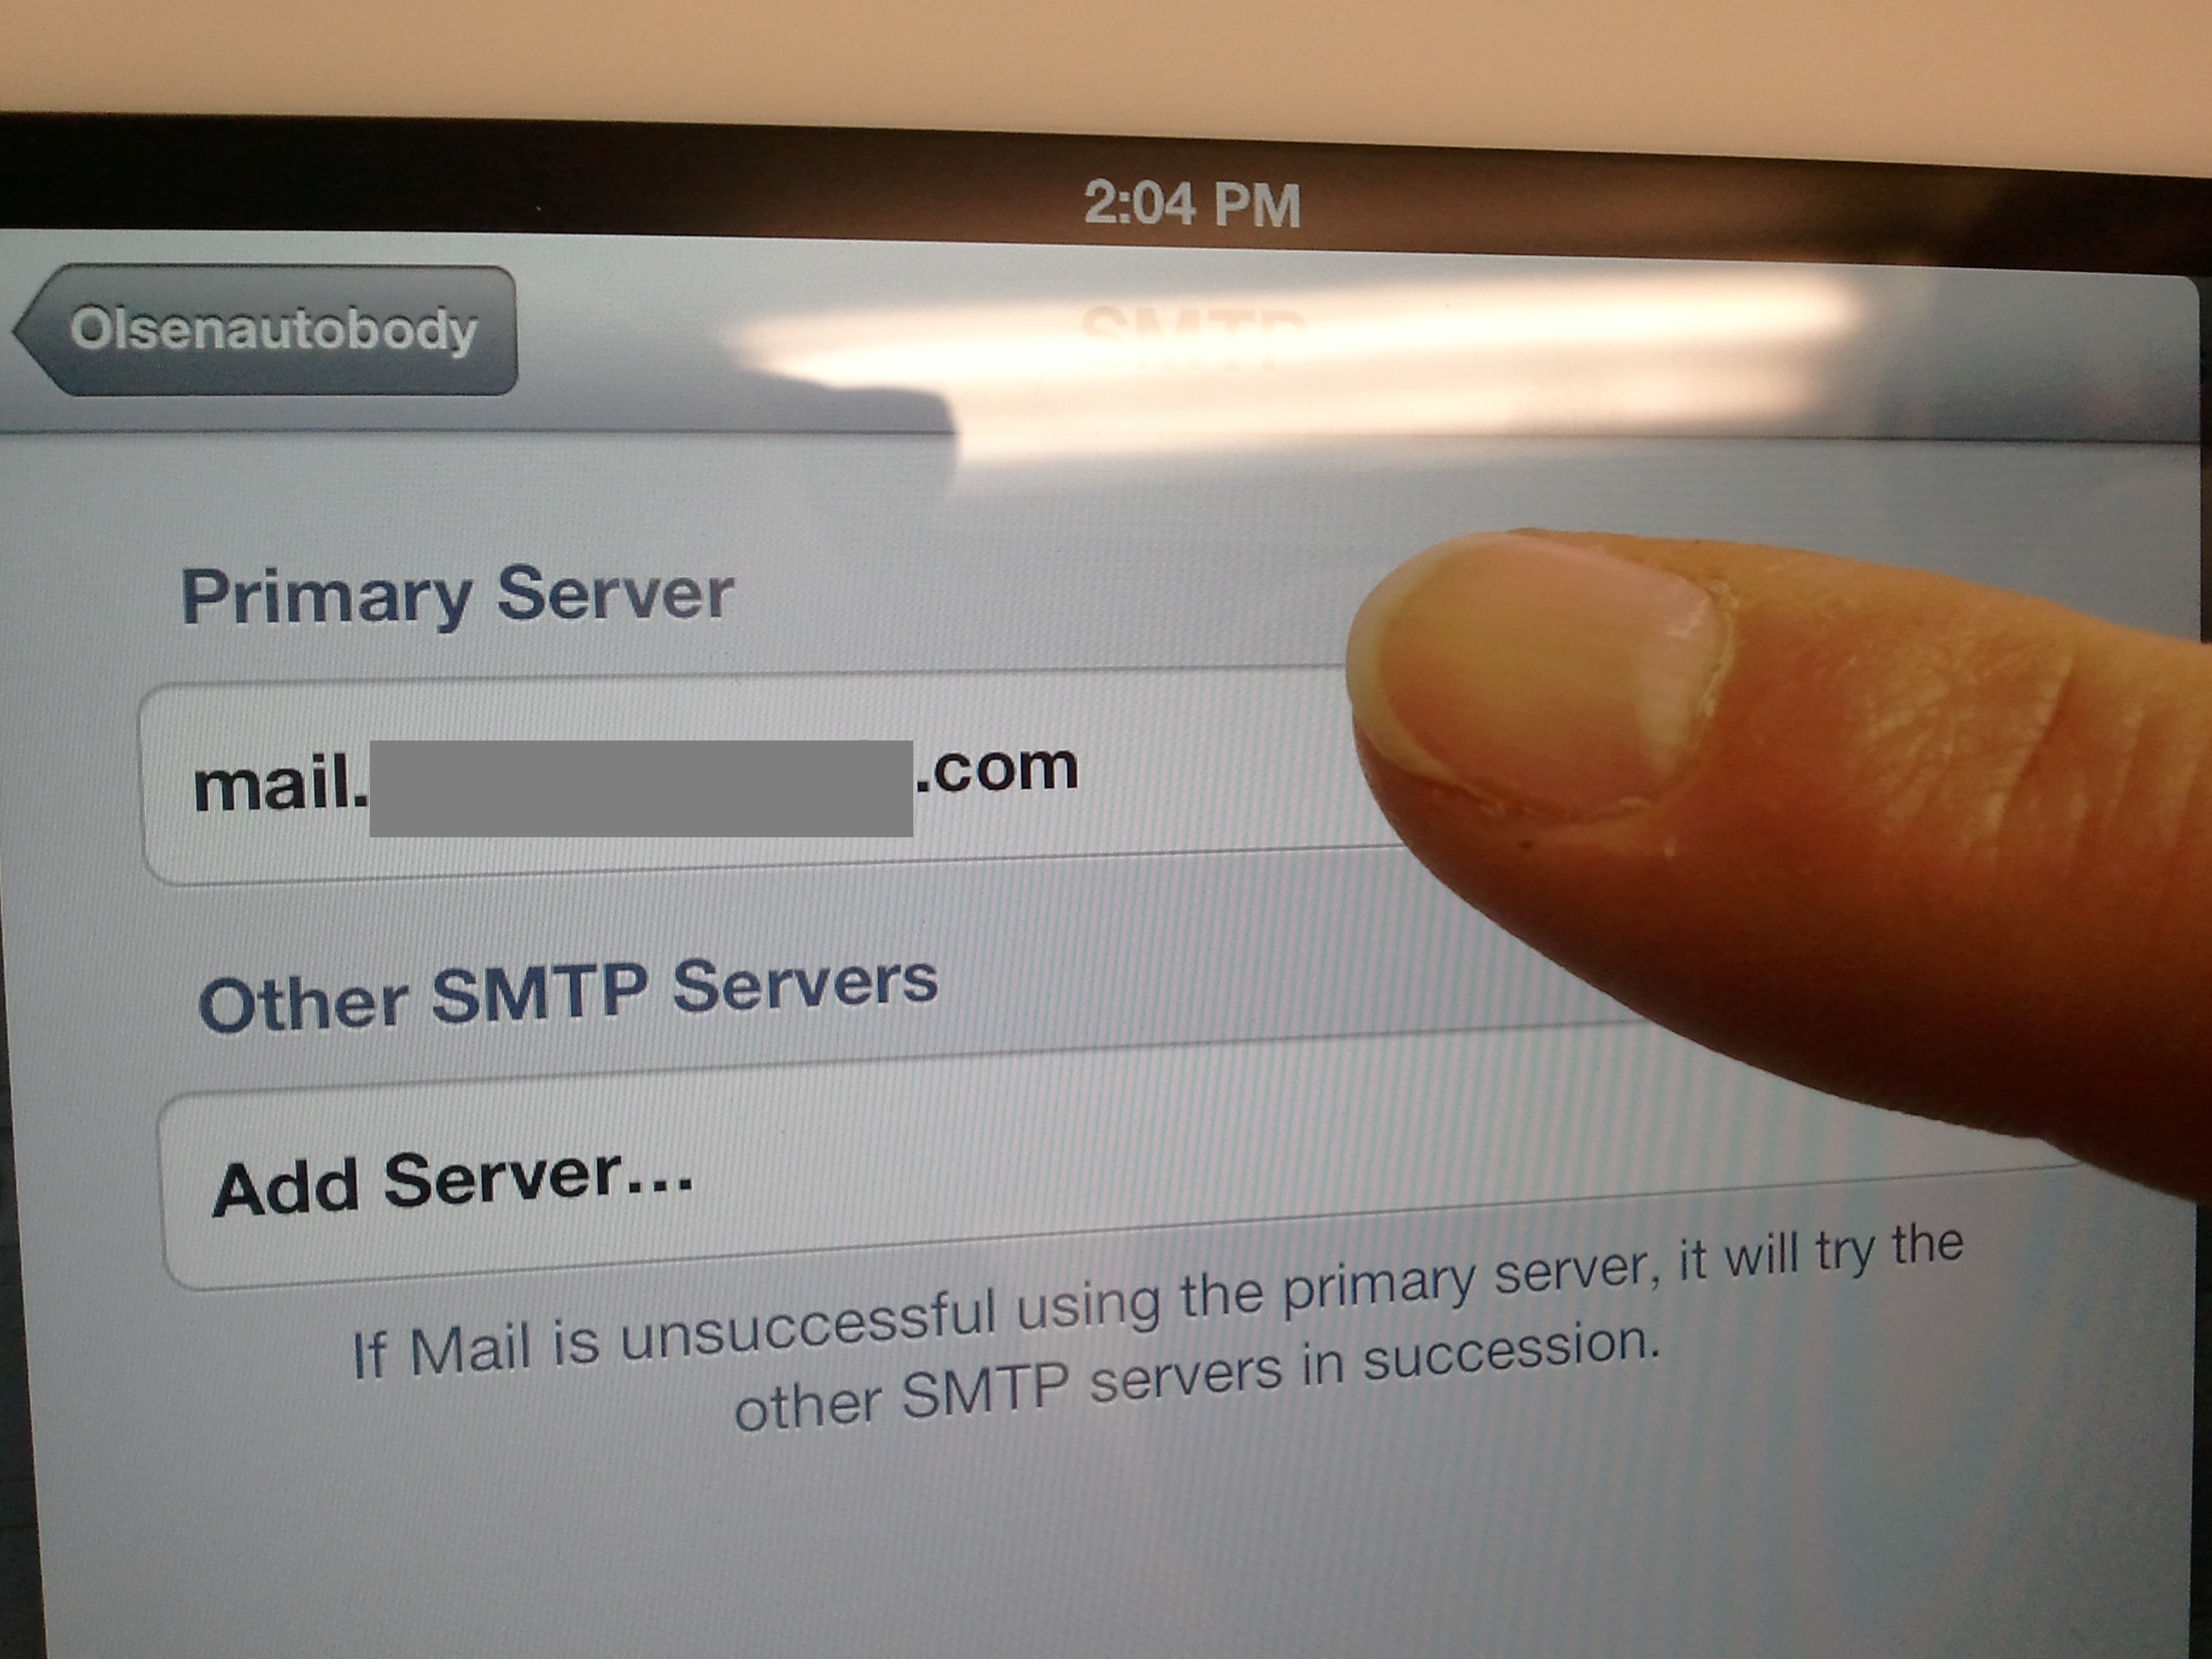
- For the "SMTP" field, select the "mail.your-domain.com >".
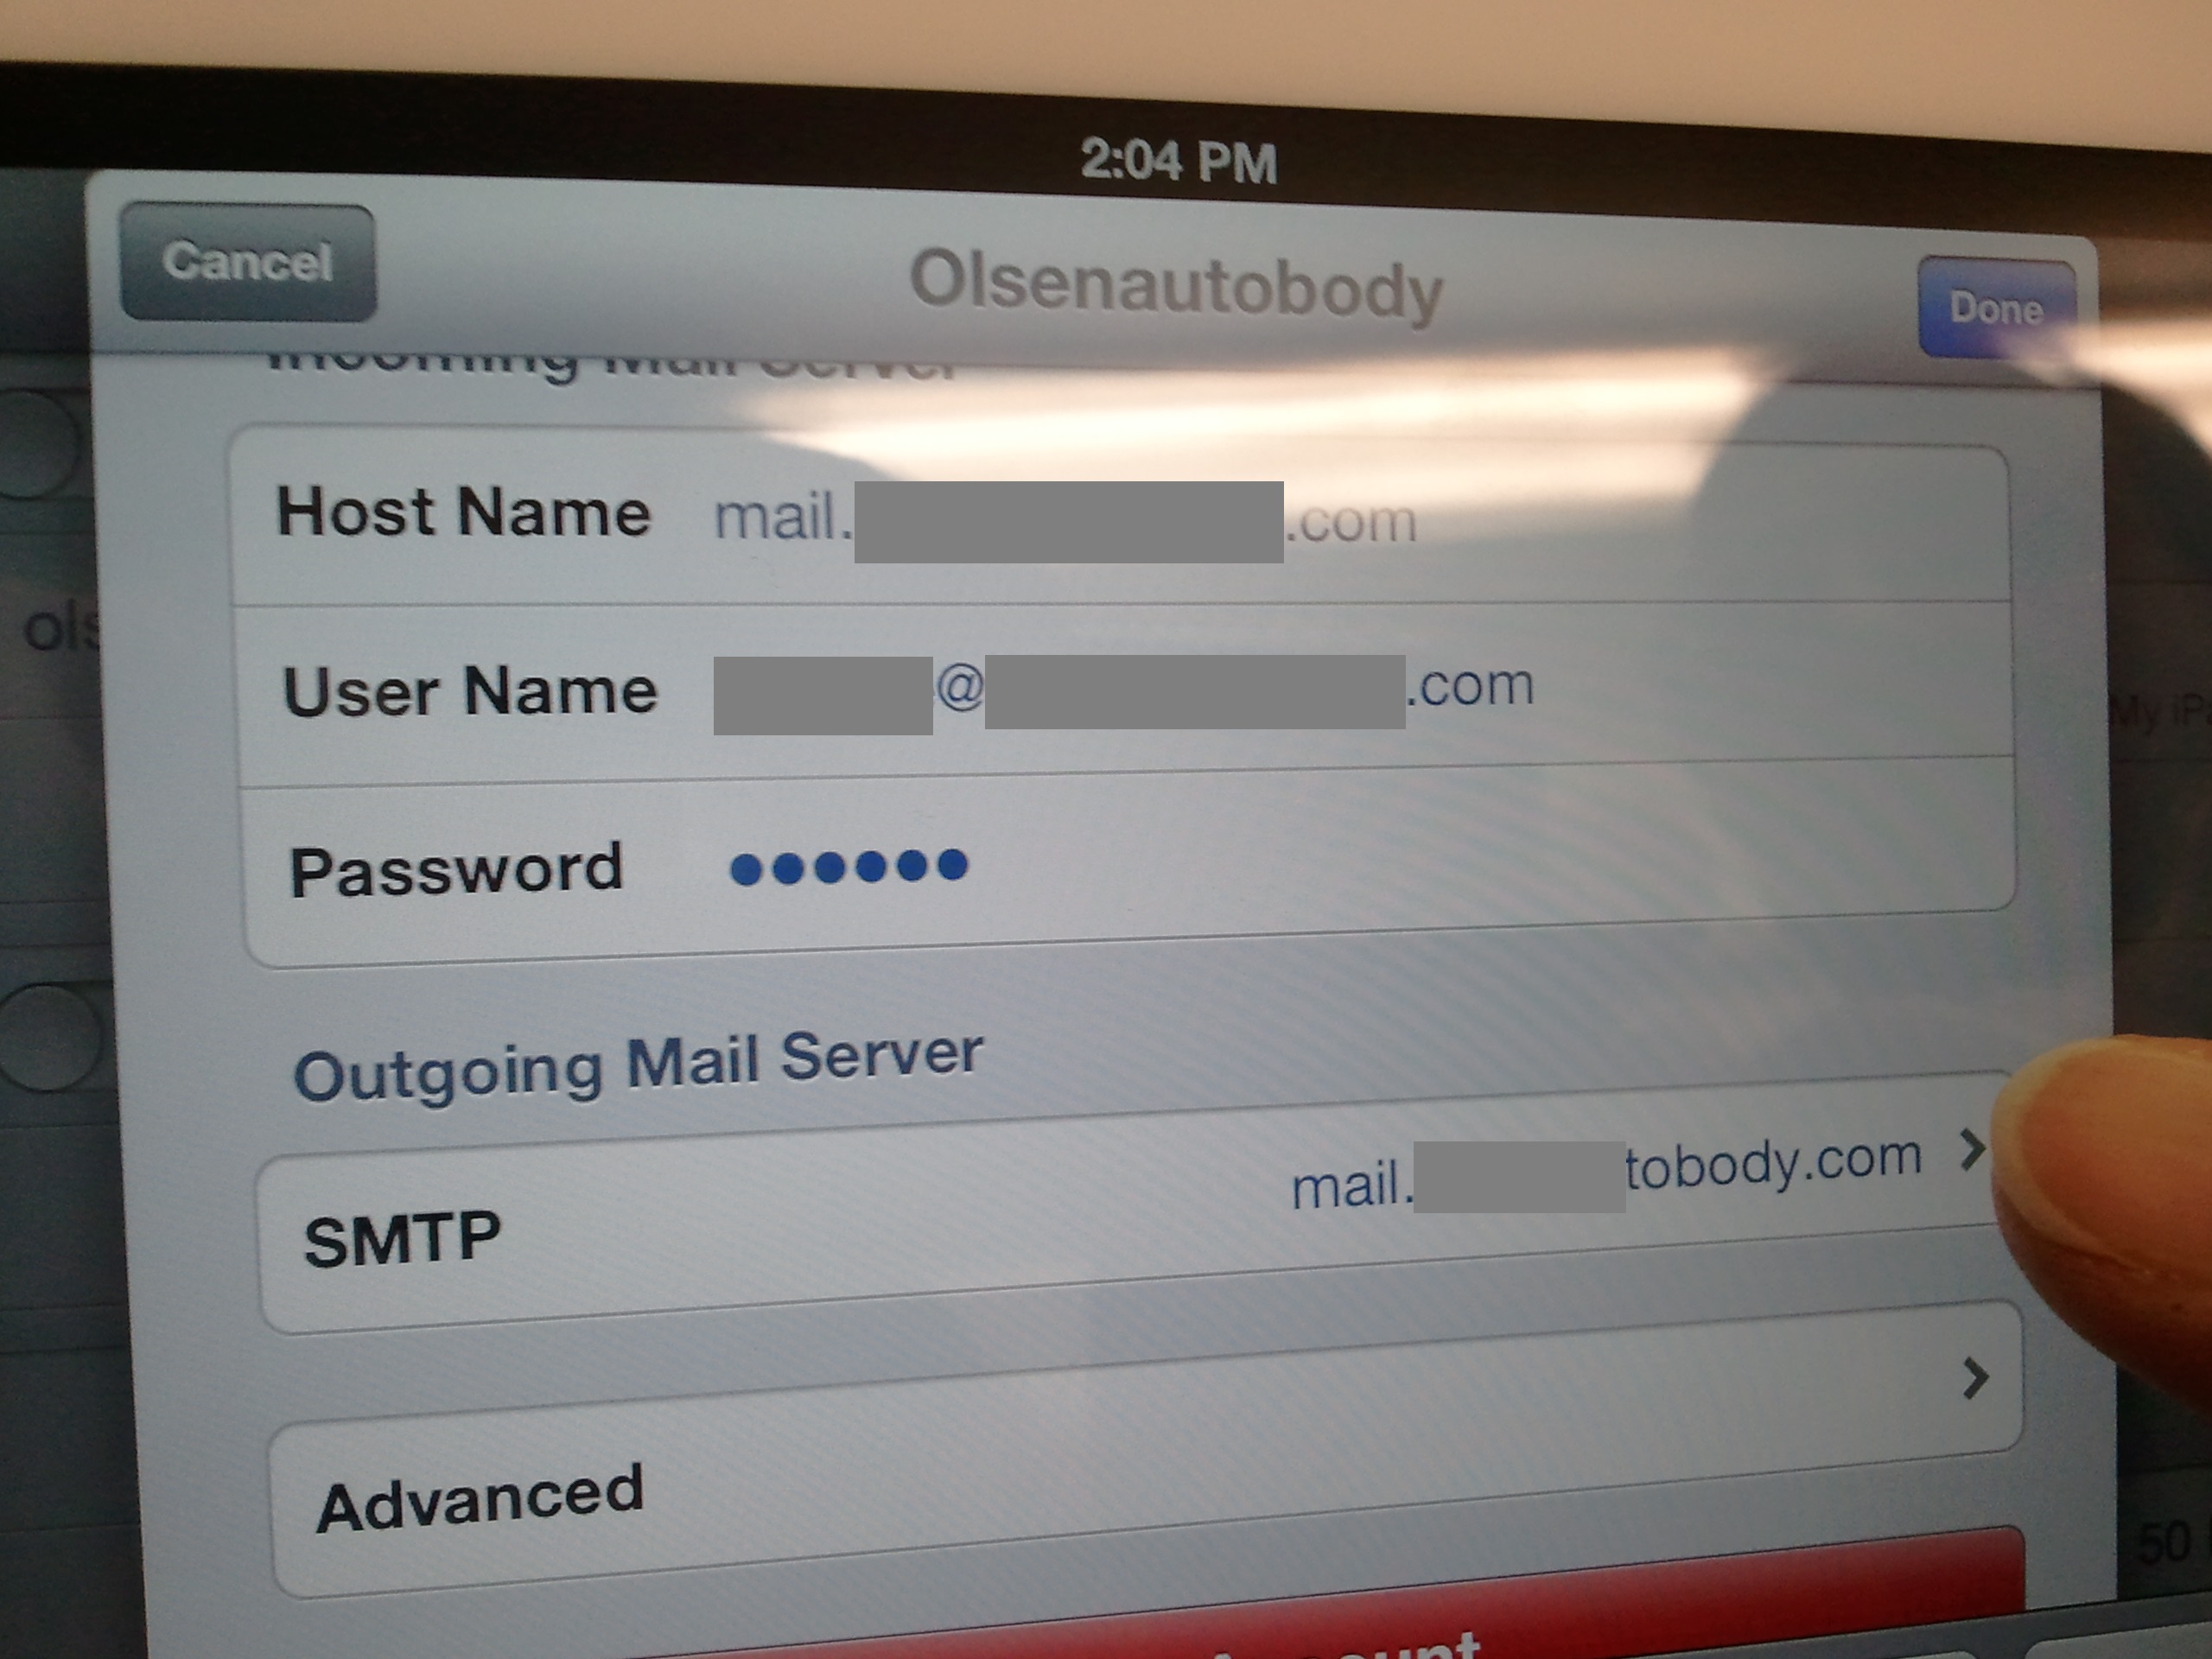
- Touch/select the Primary Server "mail.your-domain.com".
Above uses the server naming convention used by OCS Hosting, other mail hosting may use a different naming convention, check with them.
- SSL [encryption] and Ports
When this KB or SOP was written, most mail servers did not use nor require encryption. Times have changed. Most hosted mail servers (including those hosted at OCS Hosting, now require encryption for a number of valid reasons.
- Enable or set "Use SSL" to "ON".
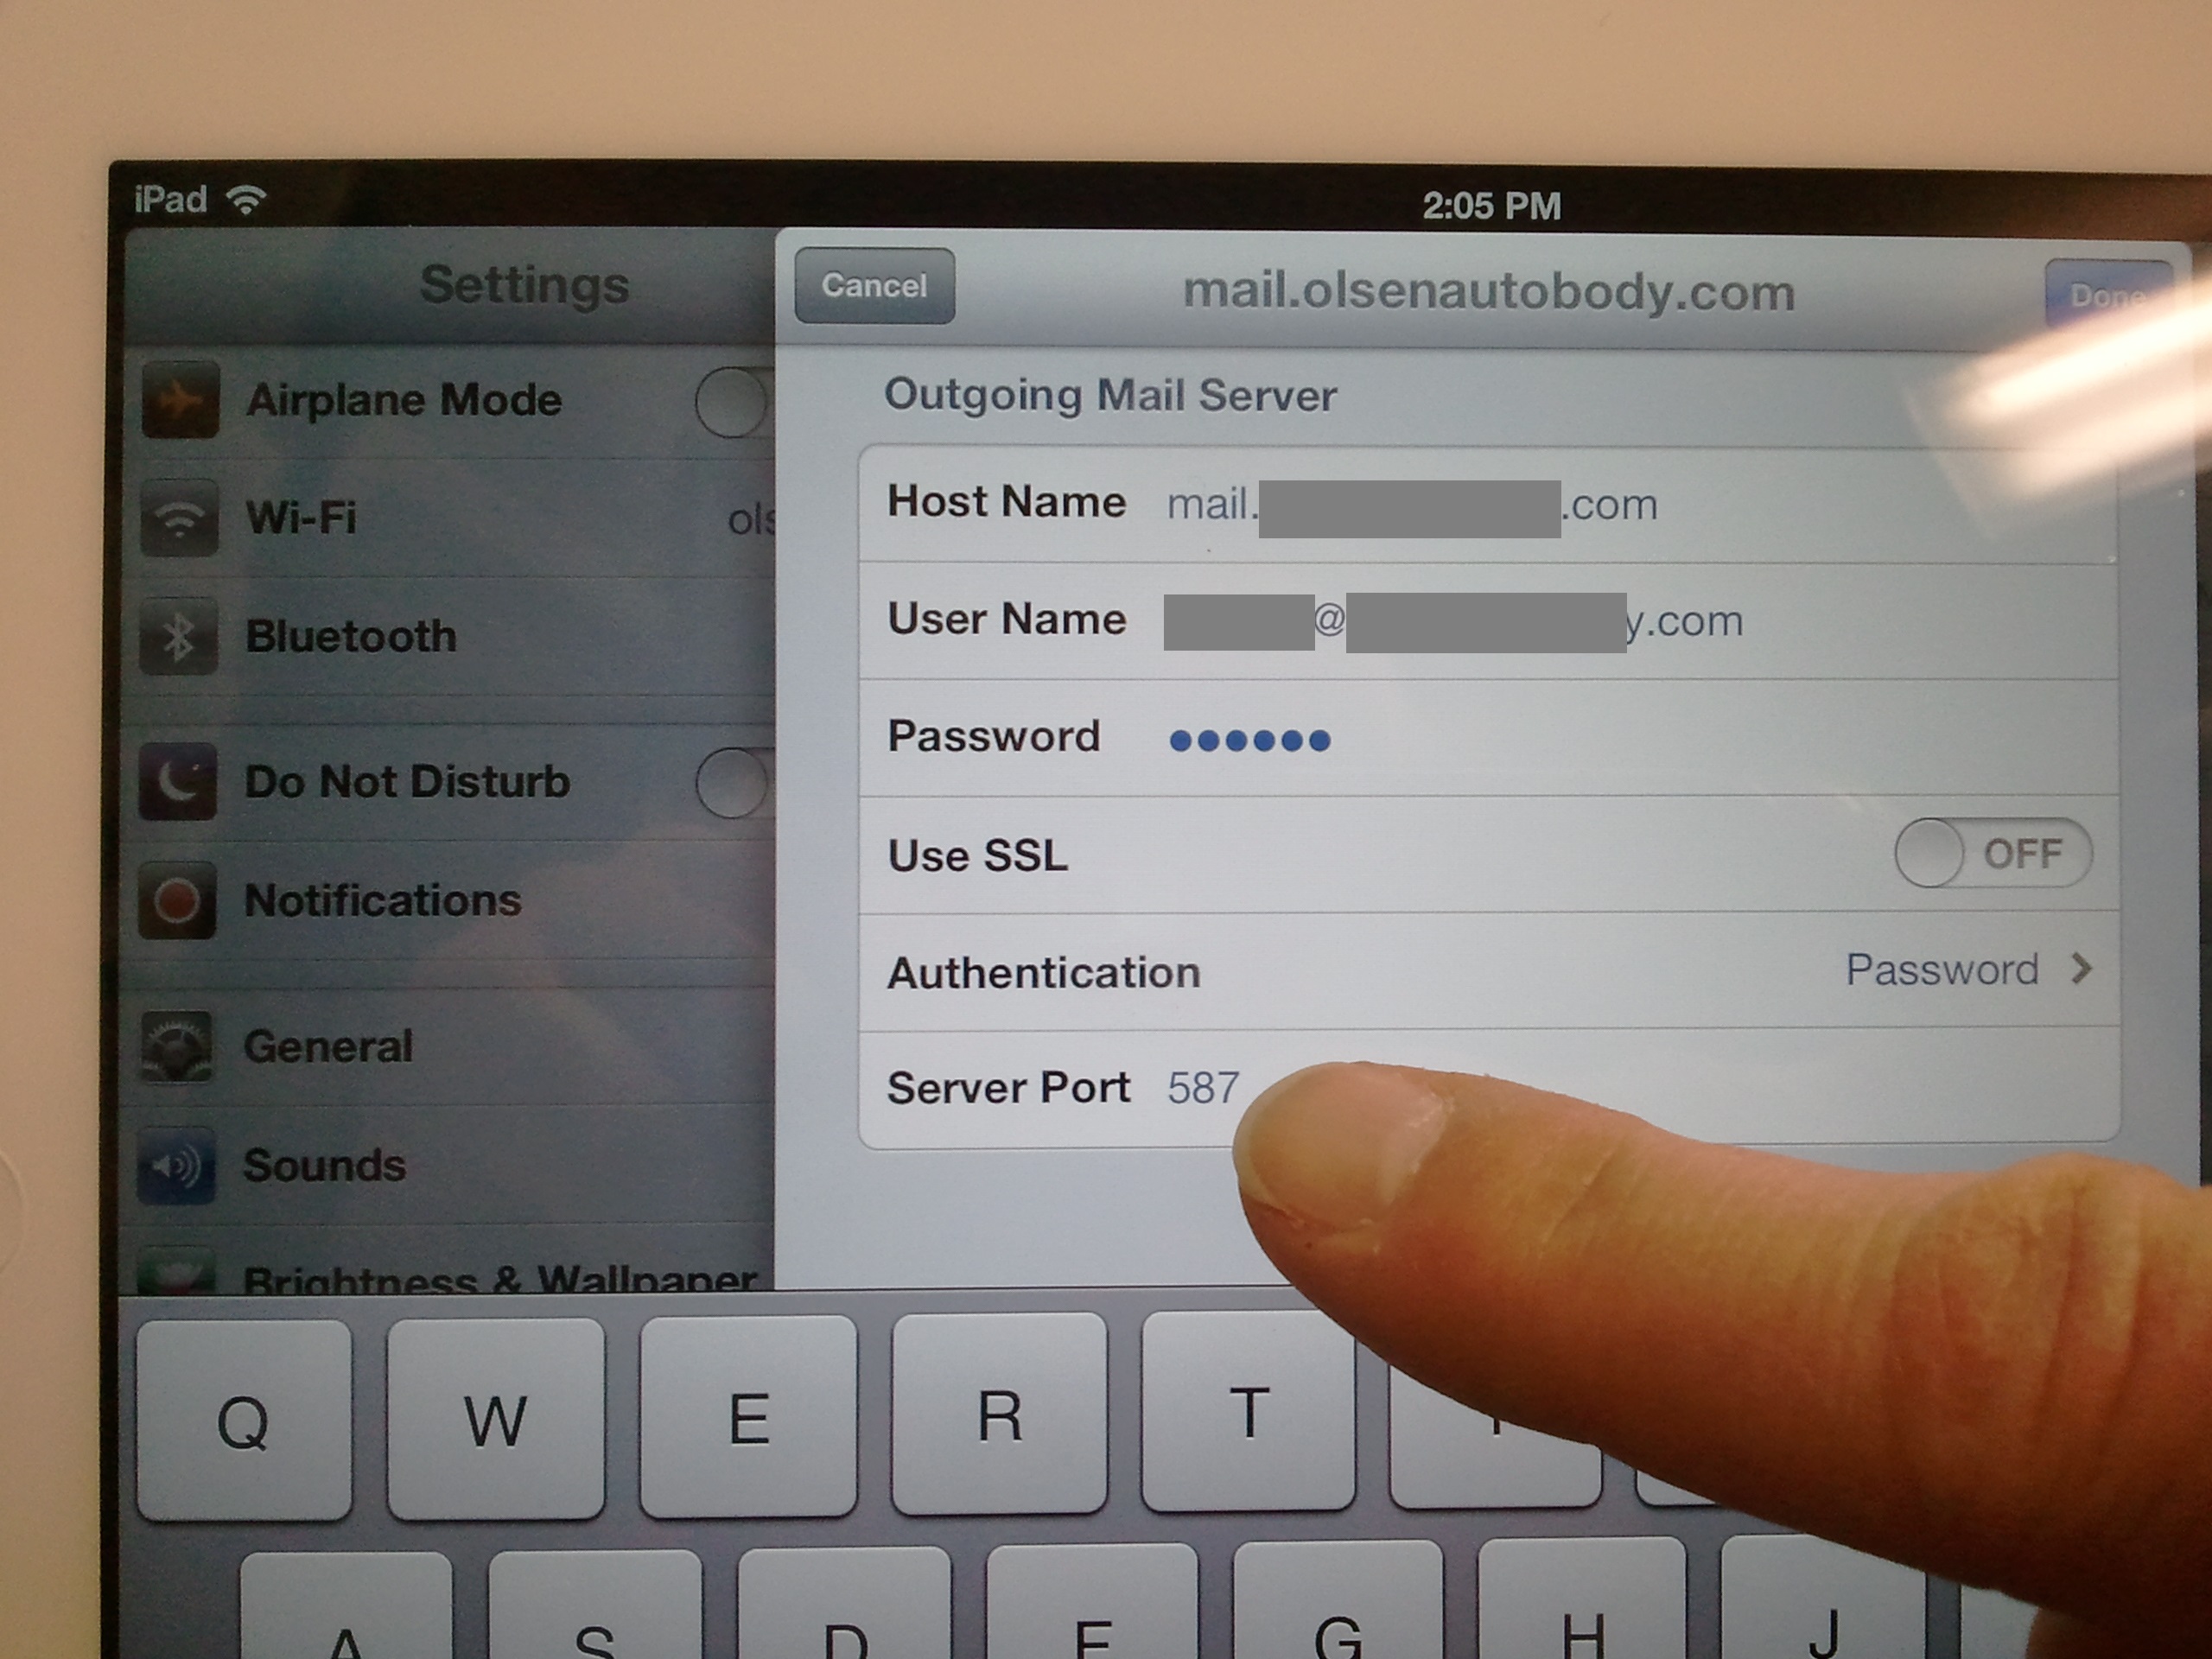
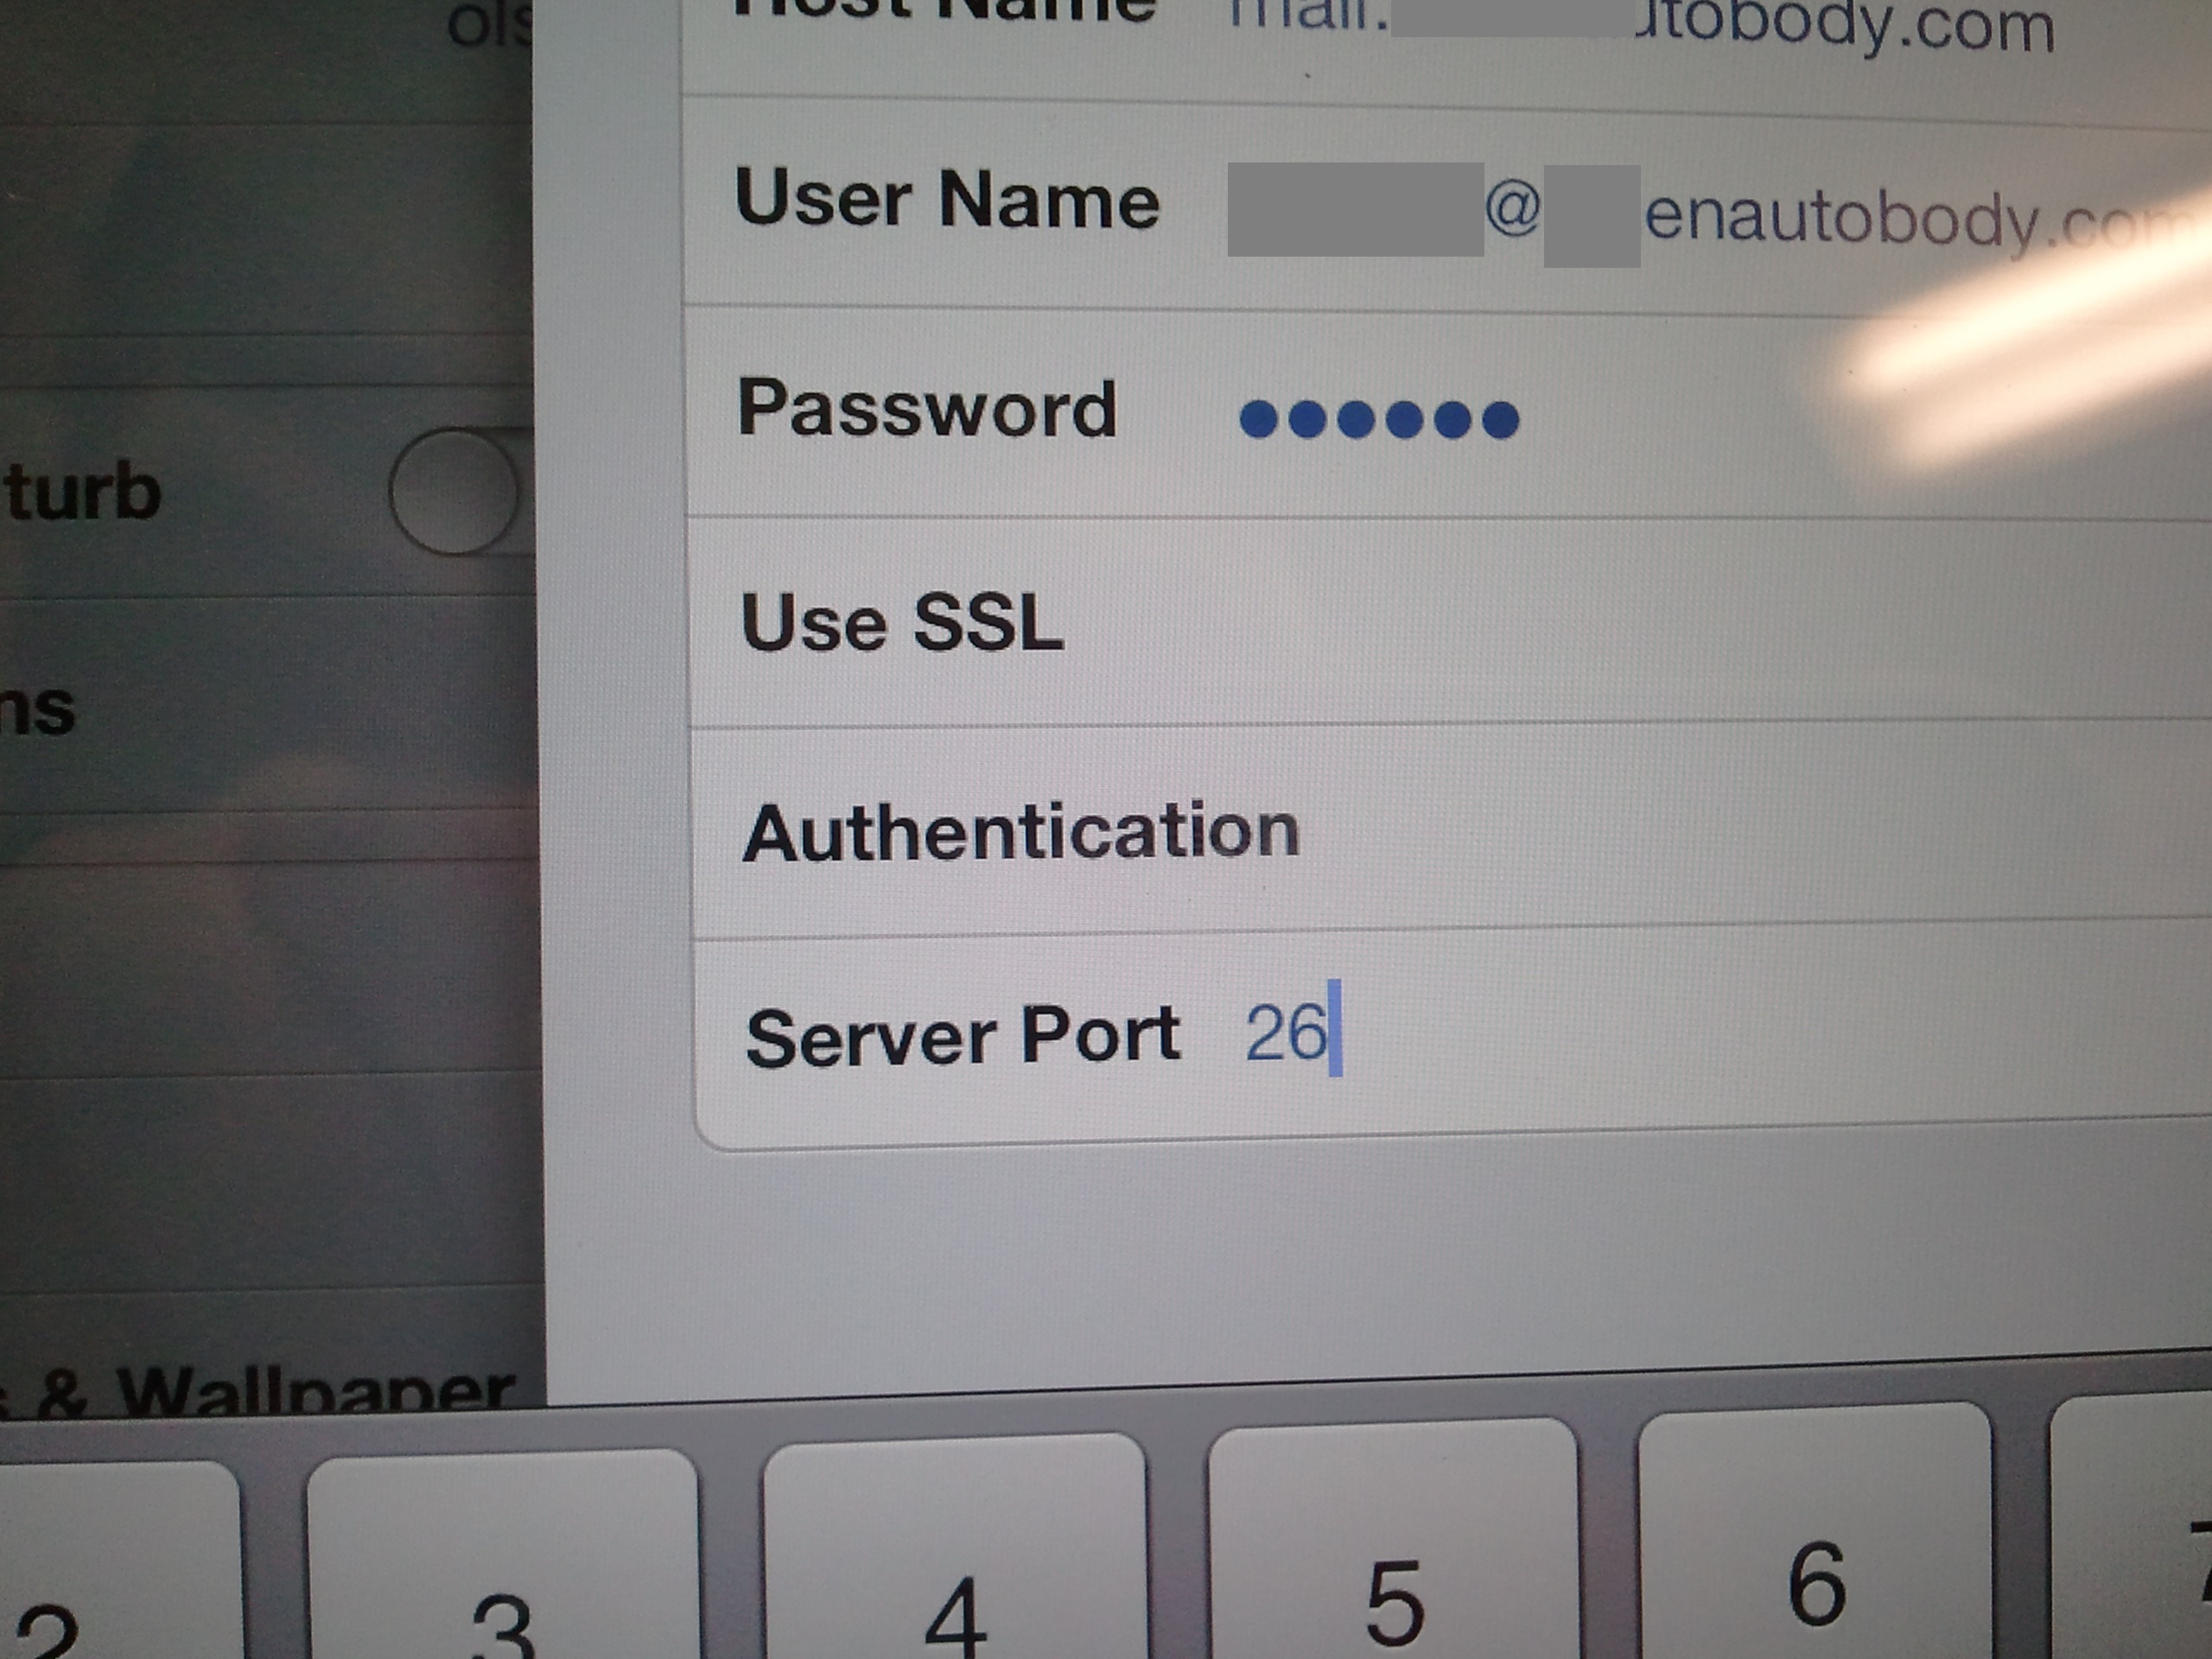
- Change the "Server Port" to
26 465 (mail hosting OTHER than OCS Hosting may be different).
- Work your way back out touching/selecting "Done" or "Save" as appropriate for each screen.
Return to:
Links and Tools page;
OCS KB & SOP page.
Copyright © 2013 to present, On-Site Computer Services.